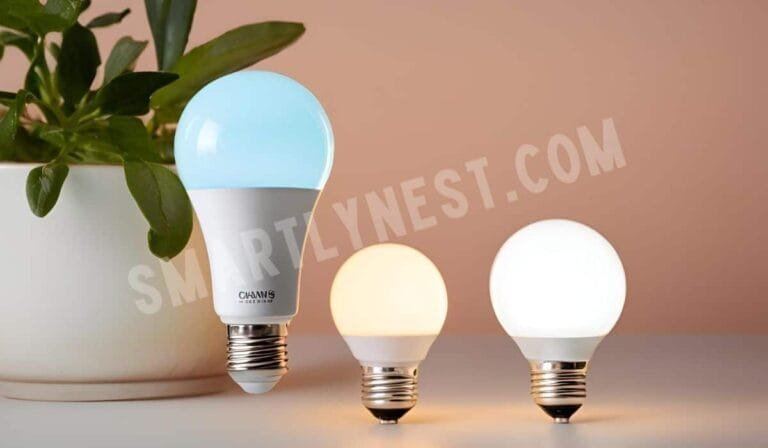
In a world where smart home technology is advancing at lightning speed, the Wi-Fi smart camera bulb stands out as a game-changing innovation. Imagine combining the utility of a light bulb with the power of a security camera—one device that can illuminate your space and keep an eye on it simultaneously. Installing a Wi-Fi smart camera bulb is not just a tech-savvy move; it’s a step toward securing your home with minimal effort and maximum efficiency. Whether you’re tech-shy or a smart home enthusiast, this guide will walk you through the entire process of installing a Wi-Fi smart camera bulb, turning your ordinary lighting fixture into a high-tech guardian of your home.
The Rise of Smart Home Security
In recent years, smart home devices have transformed how we live, offering unprecedented convenience and control over our living spaces. Among these innovations, Wi-Fi smart camera bulbs have emerged as an essential tool for home security. They provide a seamless blend of lighting and surveillance, ensuring that your home remains bright and secure.
Installing one might seem daunting at first, but with the right guidance, it’s a breeze. Before we dive into the installation process, let’s explore why these devices have become a must-have in modern homes.
Why Choose a Wi-Fi Smart Camera Bulb?
When it comes to home security, traditional cameras can be bulky, difficult to install, and often require professional setup. Wi-Fi smart camera bulbs, on the other hand, are easy to install, discreet, and offer dual functionality. Here’s why they’re a great choice:
- Ease of Installation: Unlike traditional security cameras that require drilling holes and running wires, Wi-Fi smart camera bulbs simply screw into a standard light socket. This makes them an accessible option for anyone, regardless of technical expertise.
- Discreet Surveillance: These bulbs blend seamlessly into your existing decor. Visitors will be none the wiser that they’re being monitored, making it an excellent option for both home and business security.
- Energy Efficiency: Wi-Fi smart camera bulbs not only light up your space but also do so with energy-efficient LED technology. This means lower electricity bills while keeping your home safe.
- Remote Monitoring: With a Wi-Fi connection, you can monitor your home from anywhere in the world. Whether you’re at work, on vacation, or just in another room, you can access the live feed directly from your smartphone.
Preparing for Installation: What You’ll Need
Before you start the installation, it’s essential to gather all the necessary tools and materials. While installing a Wi-Fi smart camera bulb is straightforward, having everything ready will make the process smoother.
What You’ll Need:
- A Wi-Fi smart camera bulb
- A compatible smartphone or tablet
- A stable Wi-Fi connection
- The manufacturer’s app (available on iOS and Android)
- A standard light socket
- Optional: A ladder if the bulb is being installed in a ceiling fixture
Step 1: Choose the Right Location
The first step in installing your Wi-Fi smart camera bulb is selecting the right location. You’ll want to choose a spot that offers both good lighting and a clear view of the area you wish to monitor. Consider the following factors:
- Height: Installing the bulb at a height that captures a wide area is ideal. This could be a ceiling fixture in a living room, hallway, or porch.
- Power Source: Ensure the light socket is functional and that the bulb will be connected to a power source that is always on. If the power to the socket is controlled by a switch, make sure the switch remains in the “on” position to keep the camera operational.
- Wi-Fi Signal Strength: The camera will rely on a strong Wi-Fi connection to stream video. Test the Wi-Fi signal strength in the chosen location to ensure it can support live video streaming.
Step 2: Install the Wi-Fi Smart Camera Bulb
Once you’ve chosen the perfect location, it’s time to install the Wi-Fi smart camera bulb. Follow these steps:
- Turn Off Power: Before you start, ensure the power to the socket is turned off to avoid any risk of electric shock.
- Screw in the Bulb: Gently screw the Wi-Fi smart camera bulb into the light socket, just like you would with any regular light bulb. Make sure it’s securely in place.
- Turn On Power: Once the bulb is installed, turn the power back on. The bulb should light up, indicating that it’s receiving power.
- Download the App: Next, download the manufacturer’s app on your smartphone or tablet. This app will be your control center for the camera bulb.
- Pair the Bulb with the App: Open the app and follow the on-screen instructions to pair the bulb with your device. This usually involves scanning a QR code on the bulb or entering a code provided in the manual.
- Connect to Wi-Fi: Once paired, connect the bulb to your Wi-Fi network. Ensure you select a network with a strong, stable signal to avoid connectivity issues.
Step 3: Configure Camera Settings
With the bulb installed and connected to Wi-Fi, it’s time to configure the camera settings. The manufacturer’s app will offer various options to customize your camera’s performance:
- Motion Detection: Most Wi-Fi smart camera bulbs come with motion detection capabilities. Enable this feature to receive alerts whenever movement is detected within the camera’s range.
- Night Vision: If the bulb is installed in a low-light area, enable night vision to ensure the camera captures clear footage even in the dark.
- Two-Way Audio: Some bulbs come with built-in microphones and speakers, allowing for two-way communication. This can be particularly useful for greeting visitors or scaring off intruders.
- Video Quality: Adjust the video resolution based on your preferences. Higher resolutions provide clearer footage but require more bandwidth.
Step 4: Test the Camera
Before finalizing the installation, it’s essential to test the camera to ensure everything is working correctly. Here’s how:
- Live View: Open the app and access the live view from your camera. Check the video quality and ensure the camera covers the desired area.
- Motion Alerts: Walk in front of the camera to trigger the motion detection feature. Verify that you receive alerts on your smartphone.
- Night Vision: If applicable, turn off the lights to test the night vision functionality. Ensure the camera provides clear footage in low-light conditions.
- Two-Way Audio: Test the two-way audio feature by speaking into your smartphone’s microphone and listening through the camera’s speaker.
Step 5: Secure Your Camera Feed
While the convenience of remote monitoring is undeniable, it’s crucial to ensure your camera feed is secure. Here are a few tips to keep your data safe:
- Change Default Passwords: Most smart camera bulbs come with a default password that hackers can easily guess. Change this to a strong, unique password immediately after installation.
- Enable Two-Factor Authentication: If the app offers two-factor authentication (2FA), enable it. This adds an extra layer of security by requiring a second form of verification in addition to your password.
- Regular Software Updates: Manufacturers often release software updates to fix security vulnerabilities. Keep your app and camera firmware up to date to ensure you’re protected against the latest threats.
- Monitor Access: Regularly check the app’s access logs to see who has accessed your camera feed. This can help you detect any unauthorized attempts to view your footage.
Troubleshooting Common Issues
Even with the best preparation, you may encounter some issues during the installation process. Here are some common problems and their solutions:
- Camera Not Connecting to Wi-Fi: Ensure your Wi-Fi signal is strong and that you’re entering the correct network credentials. If the problem persists, try resetting the camera and repeating the setup process.
- Poor Video Quality: If the video is choppy or blurry, try reducing the resolution in the app settings. Additionally, check if your Wi-Fi network is experiencing heavy traffic, which could affect the camera’s performance.
- No Motion Alerts: If you’re not receiving motion alerts, double-check the motion detection settings in the app. Make sure the feature is enabled and sensitivity levels are appropriately adjusted.
- App Crashes: If the app crashes frequently, try updating it to the latest version. If the issue continues, contact the manufacturer for support.
Maintaining Your Wi-Fi Smart Camera Bulb
Once your Wi-Fi smart camera bulb is installed and running smoothly, it’s essential to maintain it to ensure long-term performance. Here’s how:
- Regular Cleaning: Dust and dirt can accumulate on the camera lens, affecting video quality. Gently clean the bulb and lens with a soft, dry cloth regularly.
- Check for Software Updates: Periodically check for software updates in the app. These updates often include new features, bug fixes, and security enhancements.
- Test Functionality: Test the camera’s functionality every few months to ensure it’s still performing as
expected. This includes checking the live feed, motion detection, and night vision.
- Replace When Necessary: While LED bulbs have a long lifespan, they won’t last forever. If the bulb burns out, replace it with a new Wi-Fi smart camera bulb to continue enjoying the benefits of smart home security.
Special Opinion: The Future of Home Security
As you’ve seen, installing a Wi-Fi smart camera bulb is a straightforward process, but the benefits extend far beyond simple installation. This technology represents a significant leap forward in home security, combining convenience, efficiency, and affordability in one neat package.
In the future, we can expect smart camera bulbs to become even more integrated into our daily lives, offering features like AI-driven facial recognition, advanced motion detection, and seamless integration with other smart home devices. As the technology evolves, these devices will not only secure our homes but also offer insights into our daily habits, helping us live safer and more connected lives.
FAQ Section
Can I use a Wi-Fi smart camera bulb outdoors?
Yes, but make sure the bulb is rated for outdoor use. Some Wi-Fi smart camera bulbs are designed specifically for outdoor conditions, offering weatherproof features.
What happens if my Wi-Fi goes down?
If your Wi-Fi connection is lost, the camera will stop streaming live video. However, many models will store footage locally on an SD card or internal storage, which you can access once the connection is restored.
Can I control the camera bulb with voice commands?
Yes, many Wi-Fi smart camera bulbs are compatible with voice assistants like Amazon Alexa and Google Assistant, allowing you to control them with voice commands.
How secure is the footage from my camera?
The security of your footage depends on the precautions you take. Use strong, unique passwords, enable two-factor authentication, and keep your software up to date to protect your data.
Can I install the camera bulb in any light socket?
Wi-Fi smart camera bulbs are designed to fit standard light sockets, so you can install them in most fixtures. Just make sure the socket is powered and compatible with the bulb’s specifications.
Will the camera work if the light is off?
Yes, the camera will continue to function even if the light is off, as long as the bulb is receiving power. The camera and light functions operate independently of each other.
How much bandwidth does the camera use?
The amount of bandwidth the camera uses depends on the video quality and frequency of usage. Higher resolutions and continuous streaming will consume more bandwidth. Check the specifications of your camera for detailed information.
Conclusion
Installing a Wi-Fi smart camera bulb is a smart, simple, and effective way to enhance your home security. With just a few easy steps, you can transform an ordinary light socket into a vigilant watchdog for your home, providing peace of mind whether you’re on vacation or just relaxing in the living room. As smart home technology continues to evolve, devices like the Wi-Fi smart camera bulb will become increasingly integrated into our daily lives, offering not only security but also convenience and control. By following this guide, you’ve taken the first step toward a safer, smarter home—one where illumination and surveillance go hand in hand.


