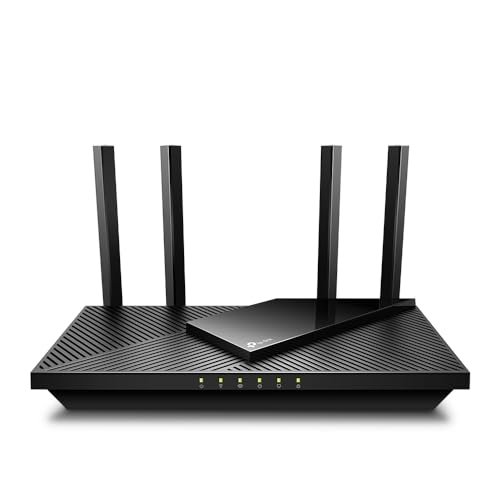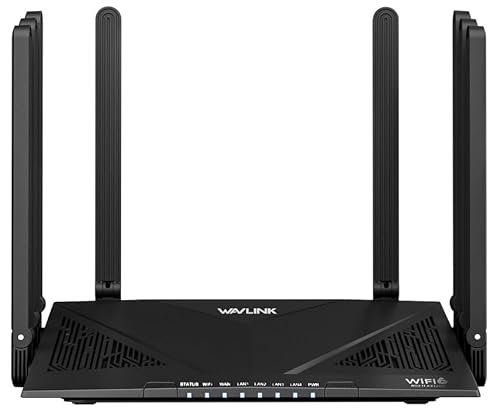
In our fast-paced digital world, staying connected is more crucial than ever. Whether you’re streaming your favorite show, working from home, or video chatting with family, a reliable WiFi connection is key. Your router acts as the heart of this connectivity, distributing internet access to every corner of your home.
But hooking it up might feel overwhelming if you’re new to technology. Don’t worry! This guide will empower you to set up your WiFi like a pro.
Throughout this journey, we’ll break down each step in an easy-to-understand way. From unboxing your router and finding the perfect spot for optimal signal strength to configuring settings that enhance security and performance — we’ve got you covered. By the end of this guide, you’ll not only have successfully set up your WiFi network but also gained confidence in navigating future tech challenges.
So grab your gear and let’s dive in!
Unpacking Your Equipment
1. The Excitement of Unboxing
When you first dive into setting up your WiFi router, the excitement is palpable—much like unwrapping a new gadget. Most packages typically include the router, an AC power adapter, and an Ethernet cable to establish a wired connection with your modem. Additionally, you’ll often find a quick setup guide that offers step-by-step instructions alongside some helpful tips. Familiarizing yourself with these items will go a long way in ensuring a smooth installation process.
2. Essential Tools
Before you start getting hands-on with your equipment, make sure you’ve got the right tools at your disposal. While many installations can be done using just your hands (and maybe a bit of patience), having a few essential tools on hand can help. A flathead or Phillips screwdriver and perhaps some zip ties for cable management could streamline your setup considerably. These little assists can also help ensure that everything is neatly organized and out of sight—nobody wants cords sprawling across their living room!
3. Confirming Compatibility
One critical aspect to check before diving into installation is compatibility with your internet service provider (ISP). Different ISPs may require specific types of routers for optimal functionality; it’s worth taking time to confirm this information beforehand. You wouldn’t want to eagerly plug in your new gear only to discover it’s not supported by your ISP. Some routers even come with stickers or notes showing compatible services, which can save you from unnecessary headaches during installation day.
4. Setting the Stage for Success
In short, setting the stage for success begins well before you plug anything in or connect cables. By knowing what’s included in the package, equipping yourself with necessary tools, and confirming compatibility with your ISP, you’re already on the right track toward hooking up your WiFi router like a pro!
So let’s get ready—a strong and stable internet connection is just steps away!
Choosing the Right Location
1. Importance of Location
When setting up your WiFi router, selecting the right location can significantly impact your internet connection’s performance. One of the primary factors to consider is proximity to the devices you plan to use most often, whether those are laptops, smartphones, or smart home gadgets. Ideally, placing your router in a central location within your home will help ensure a better signal distribution and coverage. For example, if your living room is your family’s social hub for streaming movies and playing games, positioning the router nearby can enhance connectivity.
2. Avoiding Interference
Another crucial consideration is potential interference from walls and electronic appliances. Dense materials like brick or concrete can obstruct signals, weakening your WiFi range. Additionally, devices such as microwaves and cordless phones operate on similar frequencies and may disrupt your signal if they are too close to the router. To overcome these hurdles, make sure to keep the router elevated (like on a shelf rather than on the floor) and away from large metal objects or other electronics that could interfere with its performance.
3. Testing Different Locations
Once you’ve chosen an initial spot for your router, it’s smart to test different locations within that area to find what works best for you. A quick way to gauge signal strength is through a speed test app on your phone or laptop as you walk around different rooms while connected to WiFi. If you’re noticing significantly slower speeds or dropped connections in certain areas of your home, don’t hesitate to adjust accordingly until you find an optimal spot where connectivity remains solid throughout all corners of your space.
Remember: experimenting with placement might save you from future headaches related to poor internet performance!
Connecting Your WiFi Router
1. Getting Connected
Once you’ve chosen the perfect spot for your router, it’s time to get down to the nitty-gritty of connecting it. Start with the power supply—plug one end of the power adapter into your router and the other into a wall outlet. Next up is connecting your modem; look for an Ethernet port labeled “WAN” or “Internet” on your router. Use an Ethernet cable to connect that port to the modem, which usually has its own dedicated Ethernet port for this purpose. Lastly, if you want to hard-wire any devices directly to your network (like a gaming console or desktop computer), plug additional Ethernet cables into the remaining LAN ports on the back of your router.
2. Cable Management
As you’re setting up, managing those cables can seem like an afterthought but trust us—it makes a world of difference! Consider investing in cable organizers or clips to keep everything tidy and out of sight. A well-organized setup not only looks better but also improves airflow around your equipment, which can extend its lifespan and performance. You can also label each cable if you’d like a quick reference guide for future troubleshooting or rearranging of devices.
3. Double-Checking Connections
After making all these connections, it’s essential to double-check that everything is secure—no one wants a surprise internet outage due to a loose wire! Give each cable a gentle tug; they should be firmly in place without any slack. Take another moment here: make sure that all indicator lights on your router show normal activity (usually indicated by green lights). If something seems off—a blinking red light could indicate there’s no connection between your modem and router—you may need to revisit those physical connections before moving forward with accessing settings and configurations.
4. Setting Up Your Network Efficiently
In essence, getting these initial steps right lays a solid foundation for what comes next: setting up your network efficiently! Once you’re satisfied with how everything connects physically, you’re ready for step five—accessing those all-important router settings so you can tailor your newfound wireless experience just how you like it. With patience and attention to detail in this part of installation, you’ll find success is just around the corner!
Accessing the Router Settings
1. Logging into the Admin Panel
Once you have successfully connected your WiFi router, it’s time to delve into the often-overlooked aspect of setting up: accessing the router’s admin panel. This crucial step can seem daunting at first, but with a few simple actions, you’ll be well on your way to customizing your network. To begin, open any web browser on a device that is connected to your network—be it a laptop, tablet, or smartphone. In the address bar, type in the default IP address of your router. Common addresses include 192.168.1.1 or 192.168.0.1; this typically can be found on a sticker located on the router itself or in its user manual.
2. Entering Default Credentials
Once you enter the correct address, you will be prompted for a username and password to log in to the admin panel. Most routers come with common default credentials such as “admin” for both fields or “admin” and “password.” It’s vital to reference your user manual if these don’t work since different brands may vary slightly in their defaults. Remember, keeping those factory settings could leave you vulnerable to unauthorized access, so identifying and changing these credentials should be one of your first tasks after logging in.
3. Customizing Your Settings
After gaining access to your router’s settings interface, you’ll find numerous options that allow you to customize how your WiFi operates—from naming your network (SSID) to configuring advanced security features. One of the most crucial steps at this stage is changing any default login information not just for ease of use but also for enhanced security. Cybercriminals often exploit known weak points like default passwords; therefore, ensuring that yours is strong—containing a mix of letters, numbers, and special symbols—is essential for protecting against unauthorized users attempting to infiltrate your home network.
4. Enhancing Security Features
In addition to modifying login details, explore other security features available within the admin panel such as enabling WPA3 encryption or guest WiFi networks if guests frequently visit your home. This allows you greater control over who accesses what data while maintaining privacy within your primary connection—a safeguard that many busy families will revel in! Making these adjustments not only makes life easier but will increase overall safety as well as performance by tailoring those settings according to how you use your internet daily.
Configuring Your Network Name and Password
1. Setting Your SSID
Once you’ve accessed your router’s admin panel, the next crucial step is to configure your network name, also known as the SSID (Service Set Identifier). Choosing a unique SSID not only helps in distinguishing your WiFi from neighboring networks but can also add a personal touch. Instead of using the generic name provided by the manufacturer—like “Linksys1234” or “Netgear_WiFi”—consider something creative and identifiable, such as “SmithFamilyWiFi” or “CoffeeLoversConnection.” This way, when you’re searching for available networks, it’s easy to spot yours!
2. Creating a Strong Password
Next up is creating a strong password. Many people tend to use simple passwords that are easy to remember, like “password123” or their pet’s name. However, this opens up potential security vulnerabilities. A robust password should be at least 12 characters long and include a mix of uppercase letters, lowercase letters, numbers, and special characters (like !, @, #). Taking the time to establish a strong password will protect your network from unauthorized access and ensure that your online activities remain private.
3. Testing the Configuration
After setting your SSID and password, save your changes and reconnect your devices using the new credentials. It’s essential to test out the connection by browsing various sites or streaming content to ensure everything works seamlessly. If you experience any issues while connecting, double-check that you’ve inputted the correct SSID and password—small typos can sometimes lead to big headaches!
Optimizing Performance
1. Speed Test and Monitoring
With your network configured, it’s time to optimize its performance. Start by running a speed test to measure your current internet speed. There are many online tools available, such as Speedtest.net, that provide quick assessments of your upload and download speeds. Knowing this baseline will help you gauge any future improvements after tweaking settings or upgrading equipment. Keep in mind that your connection speed can vary based on factors like the number of connected devices, their usage, and potential interference from walls or electronic devices.
2. Regularly Updating Firmware
Another essential aspect of maintaining a high-performing WiFi network is ensuring your router’s firmware is up to date. Firmware updates often include performance enhancements, bug fixes, and security patches. To check for updates, navigate to the settings menu in your admin panel and look for a section labeled “Firmware Update” or similar. Follow the prompts provided there, and don’t forget to restart your router afterward for those changes to take effect.
3. Considering a Mesh System
If you find that certain areas in your home still suffer from weak signals even after adjustments, consider investing in a mesh WiFi system. These systems use multiple units to create a blanket of WiFi coverage throughout your home, eliminating dead zones and ensuring that every device remains connected no matter where you are. With a mesh network, you can maintain strong internet access even in larger homes or those with challenging layouts.
Conclusion
Congratulations! You’ve successfully set up your WiFi router like a pro. From unboxing and connecting your devices to configuring settings and optimizing performance, you’ve taken the reins of your home network. Enjoy streaming, browsing, and staying connected with confidence, knowing that you’ve established a reliable and secure WiFi environment. Remember, technology evolves, so don’t hesitate to revisit your setup periodically to ensure everything remains up-to-date and running smoothly.
Happy surfing!
FAQs
What is a WiFi router?
A WiFi router is a device that connects to your internet service provider and enables wireless internet access throughout your home or office. It distributes the internet connection to multiple devices, allowing them to connect without physical cables.
How do I choose the best location for my WiFi router?
Place your router in a central location, away from walls, electronic devices, and large metal objects that may cause interference. Elevating the router on a shelf can also improve signal strength.
How do I change my WiFi password?
To change your WiFi password, log into your router’s admin panel using a web browser, navigate to the wireless settings section, and update the password. Make sure to save the changes.
What should I do if my WiFi is slow?
If your WiFi is slow, try the following:
- Restart your router.
- Check for interference from other devices.
- Ensure you have the latest firmware installed.
- Limit the number of connected devices.
- Consider a mesh network if your home has dead zones.
What is the difference between 2.4GHz and 5GHz bands?
The 2.4GHz band offers a longer range but slower speeds, while the 5GHz band provides faster speeds but shorter range. Choosing the right band depends on your device’s location and internet usage needs.


