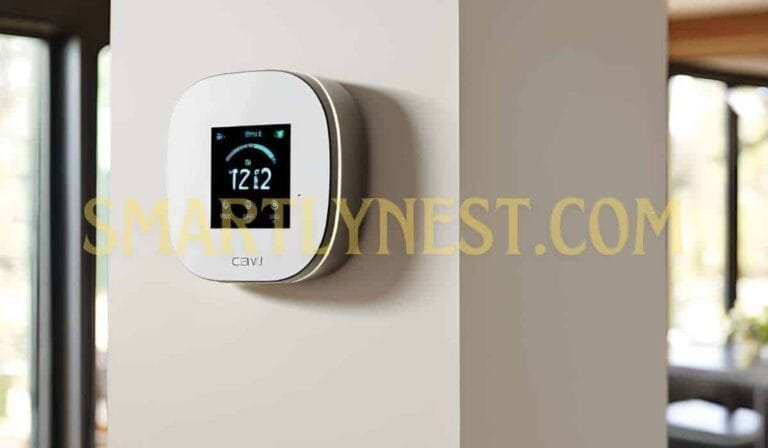
Smart thermostats are the cornerstone of modern, energy-efficient homes. With the ability to optimize heating and cooling based on your habits and preferences, they offer substantial savings on your energy bill. However, like all technology, smart thermostats need to be tested periodically to ensure they function optimally. This guide will walk you through testing your smart thermostat, highlight common issues, and offer solutions to keep your system running smoothly.
Why Testing Your Smart Thermostat is Crucial
1. The Role of a Smart Thermostat
A smart thermostat does much more than just regulate temperature. It “learns” your daily patterns, allowing it to automatically adjust the heating and cooling in your home to suit your schedule. Many models also provide features like remote control via smartphone apps, energy consumption reports, and integration with other smart home systems.
However, if your thermostat isn’t working correctly, it can lead to wasted energy, uncomfortable temperatures, or worse—potential damage to your HVAC system.
2. Signs You Might Need to Test Your Smart Thermostat
- HVAC system not turning on: If your furnace or air conditioning unit doesn’t respond when adjusting the thermostat, it’s a sign there could be an issue with the device.
- Temperature discrepancy: When the room’s temperature doesn’t match the thermostat setting, it could be a calibration or sensor issue.
- System runs continuously: If your HVAC unit is running non-stop, it might indicate the thermostat is failing to reach the desired temperature or send the correct commands to shut off.
Regular testing helps catch these issues early, saving you from costly repairs and inefficient energy usage.
Pre-Testing Preparations
Before you start testing, ensure you have the necessary tools and take appropriate safety precautions.
1. Gather Tools and Materials
You’ll need the following:
- Screwdriver: To open the thermostat or access wiring.
- Voltage tester: To check if the thermostat is getting power.
- Wire labels: Useful if you need to disconnect any wires during testing.
- User manual: Every thermostat is different, so have your model’s manual handy to refer to specific instructions.
2. Safety Precautions
Always turn off the power to your HVAC system at the circuit breaker before you start testing. This not only protects you from electric shock but also prevents damage to your system.
3. Understanding Compatibility
Before running any tests, ensure your smart thermostat is compatible with your HVAC system. Many thermostats require a C-wire (common wire) to function. If your home doesn’t have a C-wire, you may need a battery-powered model or an adapter. Checking compatibility beforehand can save you a lot of hassle.
How to Perform a Basic Smart Thermostat Test?
Here are the fundamental steps to test your smart thermostat’s functionality:
Step 1: Access the System Test Function
Most modern smart thermostats come with a built-in system test. Navigate through your thermostat’s settings menu and look for a “Test” or “System Check” option. Follow the on-screen instructions to perform the test. This will typically test both the heating and cooling systems to ensure they activate properly.
Step 2: Manual Temperature Adjustment Test
If your thermostat doesn’t have an automated test function, you can manually adjust the temperature to see if the system responds.
- Set the thermostat to a temperature higher than the current room temperature to test the heating system.
- Set it lower to test the cooling system.
Listen for the HVAC system to turn on after you adjust the temperature. You should also feel air coming from the vents within a few minutes. If nothing happens, there could be an issue with the wiring, the HVAC system, or the thermostat itself.
Step 3: Power Check
If your thermostat doesn’t turn on or seems unresponsive, it might not be receiving power. Here’s how to check:
- Check the thermostat display: If it’s blank, the thermostat might not be receiving power. If it’s battery-powered, try replacing the batteries.
- Test the power supply: Use a voltage tester to check if the wires connected to the thermostat are live. If the voltage is too low or absent, the problem could be with the wiring, a tripped breaker, or a blown fuse.
Advanced Smart Thermostat Testing Techniques
If your thermostat passes the basic tests but you’re still experiencing issues, it’s time for more advanced troubleshooting.
1. Wi-Fi and Connectivity Check
Since smart thermostats rely on Wi-Fi to offer features like remote control and energy monitoring, connectivity issues can disrupt functionality.
- Wi-Fi Signal Strength: Check the thermostat’s app or settings for Wi-Fi signal strength. Weak signals can result in intermittent operation.
- Reboot the Router: Sometimes, a simple reboot of the router can resolve connectivity issues.
- Firmware Update: Ensure that your thermostat’s firmware is up to date. Newer firmware can fix bugs and improve functionality.
2. Testing Geofencing and Scheduling
Many smart thermostats offer geofencing, which adjusts the temperature based on your location. This feature needs to be tested to ensure your system is responding correctly to your comings and goings.
- Enable Geofencing in your thermostat app.
- Leave your home for a predetermined distance.
- When you return, check if the system automatically adjusts the temperature to your preferred setting.
Similarly, test the thermostat’s scheduling feature by setting different temperature ranges for various times of the day. Make sure the HVAC system switches modes according to the schedule.
3. Energy Usage Reports
One of the best features of smart thermostats is their ability to generate energy reports. These reports track your heating and cooling patterns and can help you spot inefficiencies.
- Check the reports regularly: Compare your energy usage to see if there are any unusual spikes.
- Optimize settings: If the report shows more energy consumption than expected, adjust the thermostat’s schedule or lower the temperature settings.
Common Issues When Testing Smart Thermostats (and How to Fix Them)
Even with regular testing, issues can arise. Here are some common problems and solutions:
1. Thermostat Not Powering On
If your thermostat doesn’t power up after installation or during testing:
- Check the wiring: Ensure all wires are properly connected to the correct terminals. A loose or disconnected wire can prevent the thermostat from receiving power.
- C-wire issues: If your system doesn’t have a C-wire, you may need a battery-powered model or an adapter.
- Blown fuse: Check your HVAC system’s fuse box for any blown fuses and replace them if necessary.
2. System Doesn’t Respond to Temperature Changes
If your HVAC system isn’t responding to temperature adjustments:
- Wiring problem: Check for miswired connections, especially if you’ve recently installed a new thermostat.
- HVAC issue: The problem could lie with your furnace or air conditioning unit rather than the thermostat. Consider consulting a professional for a more in-depth diagnosis.
3. Connectivity Drops Frequently
If your thermostat frequently loses its connection to Wi-Fi:
- Router placement: Ensure your router is close enough to the thermostat. Wi-Fi range extenders can help if the signal is weak.
- Network congestion: Too many devices on the network can cause slowdowns. Disconnect unused devices or upgrade your router if needed.
4. Inconsistent Room Temperatures
If one room is consistently hotter or colder than the others:
- Check the placement of smart sensors: Smart thermostats with remote sensors can sometimes misinterpret room temperatures if the sensors are placed in areas prone to drafts or direct sunlight.
- Recalibrate the thermostat: Your thermostat might need recalibration to ensure it measures the correct temperature.
When to Call a Professional?
Sometimes, it’s best to leave things to the pros. Here are a few situations where professional help might be necessary:
1. Complex Wiring Issues
If you’re unsure about the wiring or need to install a C-wire, it’s better to consult an HVAC technician to avoid damaging your system.
2. Persistent Connectivity Problems
Frequent Wi-Fi issues might indicate a deeper problem with your home network or the thermostat itself. A professional can help diagnose and fix these issues.
The Writer’s Opinion: Are Smart Thermostats Worth It?
Smart thermostats have come a long way in terms of usability and features. In my experience, they are a fantastic addition to any home if used correctly. The energy savings alone make them a worthwhile investment for most homeowners. However, they aren’t without their downsides, especially for people who aren’t as comfortable with technology.
1. Efficiency vs. Traditional Models
Compared to traditional thermostats, smart thermostats offer significantly more control and energy savings, especially when paired with smart sensors and geofencing. The ability to adjust temperatures remotely or automate the system entirely is a game-changer for comfort and efficiency.
2. User Experience Matters
Not all smart thermostats are created equal. Some models are more user-friendly than others, and installation can be tricky for those who aren’t familiar with HVAC systems. Before purchasing, make sure you’re comfortable with the setup process and that your home is compatible with the thermostat’s requirements.
3. Final Thoughts
If you’re tech-savvy, smart thermostats are a valuable addition to your home, offering convenience, comfort, and savings. If you’re not, you may need professional help for installation and ongoing maintenance, but the benefits are still worth it.
FAQ Section
How often should I test my smart thermostat?
You should test your smart thermostat at least every six months or after any major HVAC maintenance or repairs.
What should I do if my thermostat shows an error code?
Most smart thermostats provide diagnostics through their app. Refer to the manual for your model or consult the manufacturer’s support team.
Do I need a C-wire for my smart thermostat?
Most modern thermostats require a C-wire (common wire) for power. However, there are battery-operated models available that do not require a C-wire. If your HVAC system lacks a C-wire, you might need to consider these options or use an adapter to make the connection.
How can I tell if my smart thermostat is saving me money?
To determine if your smart thermostat is helping you save money, regularly check the energy usage reports provided by the thermostat’s app. Compare these reports to your previous energy bills. Look for patterns indicating reduced energy consumption during times when you are not home or when you are sleeping. Many users report significant savings (up to 23%) once they optimize their settings.
Can I install a smart thermostat myself?
Yes, most smart thermostats are designed for DIY installation. However, ensure you follow the manufacturer’s instructions carefully. If you encounter difficulties or have a complex HVAC system, it may be wise to seek professional installation.
Conclusion
Smart thermostats offer a blend of comfort, convenience, and energy savings that traditional thermostats simply can’t match. By regularly testing your smart thermostat, you can ensure it operates efficiently and effectively, maximizing your investment.
Remember, testing doesn’t just involve checking if the system turns on; it includes ensuring accurate temperature readings, proper connectivity, and the functionality of advanced features like geofencing and scheduling.
If you encounter issues beyond basic troubleshooting, don’t hesitate to call a professional to ensure your smart thermostat—and your HVAC system—runs smoothly.
Take Action: Test your smart thermostat today, and discover how much it can improve your home’s energy efficiency and comfort!


