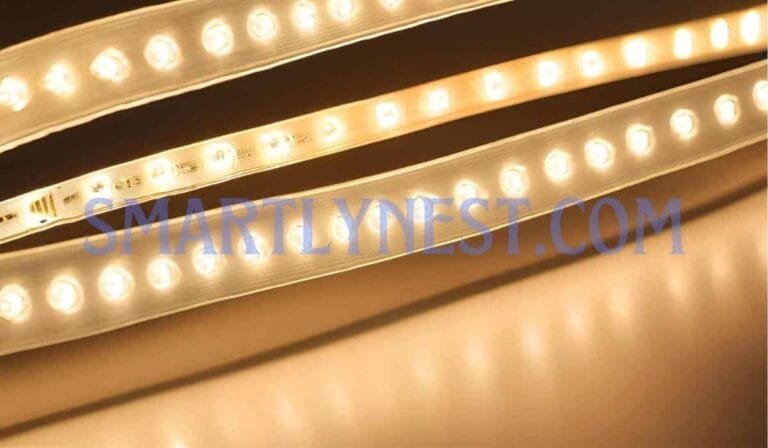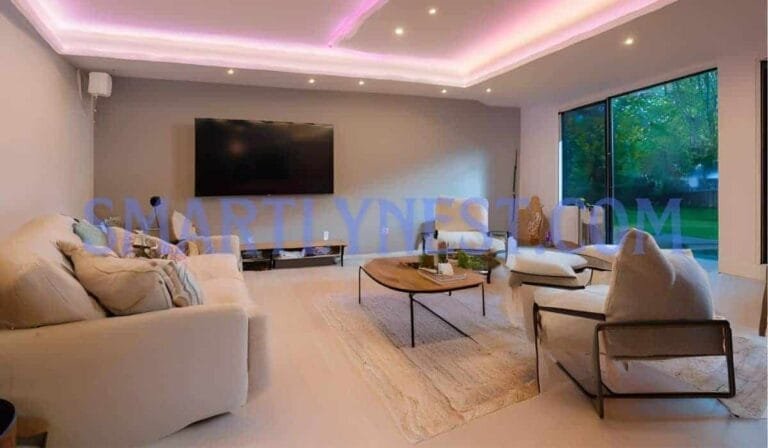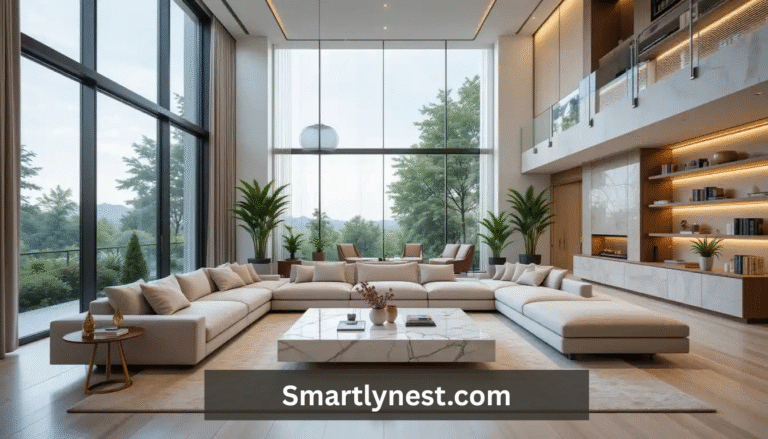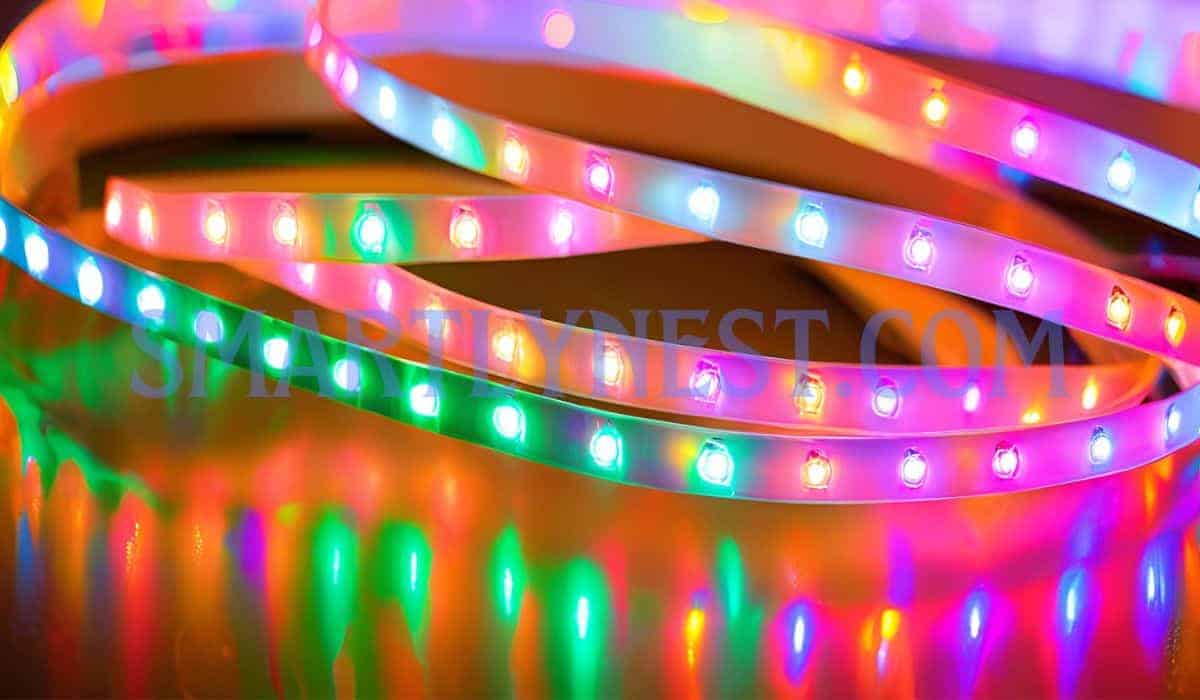
Imagine stepping into your living room, where soft strands of color bathe the walls in a warm embrace, casting an inviting glow that dances like fireflies on a summer evening. LED strip lights have emerged as the modern alchemist of home decor, effortlessly transforming mundane spaces into enchanting escapes.
With their sleek versatility and vibrant spectrum of hues, these mesmerizing lights don’t just illuminate; they narrate stories and create ambiances that evoke joy, relaxation, or even inspiration.
For DIY enthusiasts and renters alike, the allure of installing LED strip lights lies in their simple adaptability. Whether you seek to highlight architectural features or add a splash of personality to a rented apartment with limited design options, these luminous strips offer unparalleled creative freedom.
With minimal tools and expertise required, embarking on this illuminating journey promises not only aesthetic delight but also a sense of accomplishment that resonates deeply within your personal sanctuary. Ready to uncover how easy it is to elevate your space? Let’s dive into the world of luminous possibilities!
Choosing the Right LED Strip Lights
Selecting the perfect LED strip lights can feel akin to painting a canvas, where each choice contributes uniquely to the masterpiece of your space. With a diverse palette of color options, ranging from vibrant reds and soothing blues to neutral whites, these lights offer limitless design possibilities. Brightness levels vary significantly as well; some strips are designed for soft ambient lighting that whispers tranquility, while others shine brightly enough to illuminate an entire room like a clear summer day.
Evaluating the purpose—whether for enhancing mood in your living room or providing task lighting in a workspace—will guide you toward the ideal brightness and hue.
When choosing your LED strips, several critical factors demand consideration. Length is often paramount; measuring the area where you plan to install will help avoid unsightly gaps or excess material. Many strips come with adhesive backing, allowing for easy peel-and-stick installation—like effortlessly laying down wallpaper without the fuss of paste. However, make sure this backing adheres effectively to your chosen surface; glossy finishes demand extra attention during preparation.
If you’re venturing into areas susceptible to moisture, such as kitchens or bathrooms, waterproof features can safeguard your investment against dampness like armor protecting a knight.
Beyond aesthetics and functionality, practical use remains at the forefront of your decision-making process. For instance, if you’re a renter looking to personalize a drab apartment without losing your security deposit, consider lights that can be removed easily yet adhere firmly when applied. Some advanced options include RGB (red-green-blue) capabilities that allow you to cycle through colors or set displays based on mood or occasion—the modern equivalent of ambiance in control at your fingertips!
Ultimately, selecting the right LED strip lights invokes not just creativity but also practicality—the essential balance between artistry and utility that ensures a stunning transformation within any space.
Essential Tools for Installation
Transforming your space with LED strip lights is an exciting adventure, but before you plunge into the glow of creativity, it’s essential to gather the right tools. At a minimum, you’ll need a measuring tape for precision, scissors for cutting your strips to the ideal length, and a soldering iron if you’re tackling custom connections or repairs. The measuring tape ensures that every inch of light fits snugly where you envision it—like gauging how much frosting to spread on a cake before serving.
Scissors help create clean lines and tailored configurations, allowing you to shape your lighting like an artist molds clay into stunning forms.
Being adequately prepared is crucial in any project, especially one involving electrical components. Just as a chef wouldn’t start cooking without having all ingredients lined up and ready to go, setting out your tools beforehand will save time and prevent frustration during installation. Keep everything organized by placing all necessary materials within arm’s reach: adhesive clips, connectors, wire strippers (if needed), and those trusty scissors.
Think of this preparation as laying out colors on a palette; each tool plays a significant role in crafting your luminescent masterpiece.
Once you have assembled your toolkit, take a moment to familiarize yourself with each item’s purpose. This knowledge brings clarity, much like knowing which brush strokes will best illustrate the perfect sunset scene on canvas. When starting with LED strip lights, proper use of tools guarantees not just ease but also safety throughout the process.
Tackling minor tasks such as measuring accurately or ensuring clean cuts in wires can safeguard against potential mishaps later on—a stitch in time saves nine.
Before diving into installation, set a comfortable workspace that invites inspiration while minimizing distractions. Adequate lighting (ironically!), perhaps from soft ambient sources or natural daylight streaming through windows—will help you see details clearly as you embark on this lighting journey. With all tools collected and workspace prepared, you’re now fully equipped to illuminate your vision!
Preparing Your Space
Now that you’ve gathered your tools and are primed for creativity, the next step is preparing your space to elevate those LED strip lights from mere decoration to a design statement. Selecting the ideal location is crucial. Picture casting a warm glow along the edges of a coffered ceiling, or envision how strips can create an inviting ambiance beneath kitchen cabinets during evening gatherings.
Consider where you spend the most time and what mood you’re aiming to achieve; bathrooms bathed in soft blues feel spa-like, while vibrant colors illuminating shelves can transform your living room into a lounge of energy and fun.
Once you’ve chosen your spots, it’s essential to ensure surfaces are clean and primed for adhesion. Any dust, grease, or grime can severely compromise the adhesive backing on strip lights, causing them to peel away unexpectedly. For optimal results, gather some gentle all-purpose cleaner and a microfiber cloth—these will sweep away any lurking debris without leaving messy residues that other materials might deposit.
Wipe down your chosen areas thoroughly so they’re like fresh canvases waiting for your artistic touch. Let the cleansed surfaces dry completely; this moment allows invisible moisture evaporation to set the stage for seamless installation.
Additionally, consider lighting dynamics by analyzing light levels in different corners of the room throughout various times of day. Some spaces may require additional brilliance during daytime while others evoke serenity with dimmer options—even daylight’s natural transition calls for adaptability in placement choices. You may even wish to experiment by temporarily taping strips to walls or furniture before fully committing; getting a sense of how light transforms shapes within your room gives insight into how best these strips will interact with existing decor.
Prepare not only physical spaces but also your mind for adventure! Lean into trial-and-error moments as you design—a well-defined plan ignites inspiration but flexibility breeds creativity. Whether upgrading your cozy nook or scaling new heights of chic sophistication in large open areas, preparation creates pathways that lead seamlessly into stunning illumination just waiting to unfold with every bit installed!
Measuring and Cutting the Strips
Transforming your space with LED strip lights begins with precise measurements. Start by identifying where you want the light to glow—perhaps under kitchen cabinets or along a vibrant accent wall. Using a measuring tape, follow the contour of your chosen area to determine how much length you’ll need. Visualize the way light dances off surfaces as you measure; aim for an installation that creates ambiance, like a soft sunset washing over a beach.
Jot down the measurements to avoid any miscalculations as you prepare to make your cuts.
Once you’ve confirmed your required length, it’s time for cutting—but approach this step with care. Most LED strips are designed for easy customization and feature designated cutting points every few inches, often indicated by dotted lines. Use sharp scissors to clip precisely at these intervals, ensuring not to cut through any of the copper circuitry within the strip. Imagine slicing through warm butter; keep your motions smooth and fluid to prevent any fraying or accidental damage.
As you stand ready to cut, visualize each segment you create as a piece of art rather than just lighting material. After trimming, gently inspect both ends of each section; they should bear clean edges without any exposed wires or jagged residues that could hinder connectivity later on. Think of this phase as sculpting—a delicate process requiring attention to detail, assuring that each piece is perfect for its intended place in your design layout.
Bear in mind that should the need arise for a longer stretch or unique shapes, connectors and extension cables are readily available tools in most DIY kits. Embrace creativity! Whether winding strips around furniture legs for atmospheric glows or delineating pathways with subtle hues, precision in measuring and cutting opens doors to endless possibilities—all while illuminating your personal style throughout the space like constellations scattered across an evening sky.
Installing Your LED Strip Lights
With your strips measured and cut to perfection, it’s time to breathe life into your vision by installing those vibrant LED lights. Begin by peeling back the adhesive backing on your LED strip. This adhesive is like a loyal companion, designed to cling tenaciously to the surface you choose. Carefully, position one end of the strip against your chosen installation area—be it under kitchen cabinets or along ornate ceiling coves.
Press firmly as you work along its length; let the beauty of instant illumination envelop your space without fear of it slipping away like an unwelcomed thought.
As you journey around corners, visualize a flowing river that bends gracefully rather than crashing into sharp rocks. When encountering a corner, avoid risking unsightly gaps by opting for gentle curves instead of abrupt angles. Most LED strips can be easily manipulated at designated cut points, where small copper pads signal you when it’s safe to snip. For an impeccable transition around corners, consider using corner connectors or creating “L” shapes in your strip design itself—this clever technique allows light to flow uninterrupted while maintaining pristine aesthetics.
If adhesive just isn’t cutting it for specific surfaces or if you’re looking for added support, clips become essential allies in this task. These handy little fasteners hold your strips securely and can be installed with ease—simply screw them into place periodically along the length of the strip. Think of them as tiny guardians ensuring that every beam of light shines consistently across your room without any wavering distractions.
As you work, take care to step back occasionally and admire the alignment; sometimes bending down low gives you clearer insights on how well everything harmonizes together.
The key lies in being patient and attentive during installation—the more love poured into applying these lights now means enhanced enjoyment later on! Ensuring that no visible gaps disrupt your clean lines pays off tremendously when flipping that switch transforms dull shadows into captivating highlights filling your home with warmth and enchantment at a moment’s notice. Allow creativity to flow freely as you bring ambiance alive through each carefully placed section!
Wiring and Power Connection
When it comes to breathing life into your space with LED strip lights, understanding the intricacies of wiring and power connection is paramount. Each LED strip operates at a specific voltage—commonly 12V or 24V—making it essential to match your lights with the appropriate power supply. The connectors attached to the strips often vary; some employ simple screw connections while others might utilize soldered joints.
For instance, if you’re installing under-cabinet lighting for your kitchen counter, opting for a reliable power supply will not only enhance aesthetics but also ensure longevity, preventing that dreaded flicker that can ruin an otherwise perfect ambiance.
Safety should reign supreme when connecting these vibrant strands of light. If you’re venturing into more complex installations, ensure you have all necessary materials on hand—including electrical tape and heat shrink tubing—to secure attachments safely. Avoiding dangers such as exposed wires is a top priority; consider investing in enclosures or cable sleeves that provide additional protection from accidental moisture contact in areas like bathrooms or kitchens.
Remember to turn off power at the circuit breaker before making any modifications; this simple act shields you from potential shocks while allowing you to work confidently and effectively.
To illustrate proper connections further, picture threading together small metal clips designed specifically for LED installations—these serve as both connectors and protectors against wear and upheaval over time. Make sure each connection is snug yet accommodating enough for slight adjustments; they should glide together smoothly like pieces of art fitting perfectly into their frames. Once everything is securely wired up, give your setup a final check—ensuring polarity matches between your LED strips and power supply will pave the way for a seamless integration into your decor, illuminating every corner with brilliance!
In summary, connecting your LED strip lights requires precise attention to detail when considering voltage specifications and connector types. Prioritizing safety measures during installation enables continued enjoyment without fear of mishaps down the line. With these guidelines in mind, allow inspiration to flood through as you pencil out innovative lighting designs that elevate both functionality and style within your cherished space!
Enhancing with Smart Features
In the ever-evolving world of home decor, integrating smart lighting technology into your LED strip setup can elevate your space from mere illumination to a dynamic atmosphere tailored to any occasion. Picture this: the gentle glow of your living room lighting responding seamlessly to your voice, creating an ambiance suited for cozy movie nights or lively gatherings with friends. With options like Amazon Alexa or Google Assistant, setting the mood has never been easier—simply utter a command and watch as your lights dance to life in a shimmering array of colors.
Incorporating smart features doesn’t just stop at voice control. Many innovative apps enable remote access to manage your lighting system right from the palm of your hand. Imagine being on vacation and having the ability to adjust your home’s lighting scene, casting away shadows and deterring potential intruders by making it appear that you’re still present. Compatible applications like Philips Hue or LIFX offer not only local control but also pre-set themes and timers that synchronize with sunrise and sunset, ensuring that your space feels alive throughout the day.
What’s more, these smart systems often allow for customization far beyond basic color selections. Create scenes that resonate with specific moods; imitate flickering candlelight for intimate dinners or vibrant party vibes with pulsating patterns synced to music—your imagination is the only limit. Some systems even integrate seamlessly with security cameras, enhancing both safety and atmosphere by allowing you to program lights to mimic natural behavior when you’re away.
As you explore these technological advancements, let yourself experiment creatively with different settings. Each band of light carries tremendous potential: it can transform an ordinary room into a haven of relaxation during meditative evenings or energize spaces during bustling family breakfasts. Embrace this modern twist on home lighting by connecting those strips you’ve installed to a smarter ecosystem, bringing elegance and convenience together harmoniously in one beautifully lit area.
Troubleshooting Common Issues
As you bask in the colorful glow of your newly installed LED strip lights, encountering issues like flickering or unresponsive strips can be frustrating. Flickering may stem from a range of causes—one of the most prevalent being inadequate power supply. When the voltage fluctuates, it can create a visual strobe effect reminiscent of an old film reel, detracting from the serene ambiance you aimed to achieve.
To rectify this, check whether your power source matches the voltage requirements specified for your LED strips. If they are mismatched, consider replacing the adapter to ensure a consistent flow that keeps those lovely lights shining steadily.
If some sections of your LED strips remain stubbornly dark or unresponsive, don’t despair! A common culprit might be loose connections or damage at cut points. Carefully inspect these areas; like a detective unraveling clues on a suspect board, look for any signs of visible wear or disconnection. Should you find entries into the circuit that appear frayed, using electrical tape can provide a quick but effective solution to reestablishing contact and restoring brilliance.
Additionally, if your setup features segments connected by connectors rather than continuous strips, make certain these connectors sit snugly and securely.
In cases where troubleshooting turns tedious with no results in sight, ensuring the cleanliness of both surfaces and contacts is vital. Dust and debris can act like sneaky gatekeepers keeping power from flowing as intended; gently clean these areas before making any adjustments. For extreme situations—consider resetting your smart lighting system by disconnecting and reconnecting them power-wise (like giving it a digital breath). This simple act can often solve snags without too much complication.
Remember, patience is critical during this process. Just as sculptors chisel away imperfections to reveal beauty within stone, taking time to locate and resolve these issues will bring forth the enchanting lighting atmosphere you envisioned for your space. With focus on these quick fixes clearly mapped out before you, rest assured that every flicker resolved brings you one step closer to creating that perfect ambiance with brilliant LED strip lights illuminating your environment beautifully.
FAQ
What materials do I need to install LED strip lights?
You will need LED strips, a power supply, adhesive backing or mounting clips, a measuring tape, and optional accessories like connectors, dimmers, or controllers.
How do I prepare the surface for installing LED strip lights?
Clean the surface where the LED strips will be installed to ensure the adhesive sticks properly. Remove dust, dirt, and debris with a dry cloth or mild cleaner.
Where should I place LED strip lights for the best effect?
Place them in areas like under cabinets, along ceilings, or around architectural features to create accent lighting. Ensure an even spread of light for the best visual effect.
How do I connect LED strip lights to a power supply?
Connect the strip to a power supply by plugging it into a DC adapter or wiring it directly. Ensure the power supply voltage and wattage are compatible with the strip.
How do I secure LED strip lights if the adhesive backing is not strong enough?
Use mounting clips, brackets, or double-sided tape if the adhesive backing isn’t strong enough. Reinforcing the strip with a stronger adhesive can also help.
Let Your Imagination Shine
In conclusion, embracing LED strip lights invites a cascade of vibrant possibilities into your space. These dazzling strips not only illuminate your surroundings but also transform the ordinary into extraordinary masterpieces. With stunning color options and innovative smart features at your fingertips, you can effortlessly elevate your home decor while enjoying increased energy efficiency and functionality.
Picture the warm glow washing over walls like sunlight spilling through a window, casting enchanting shadows that dance with every flicker—this is the magic of LED lighting.
Take this opportunity to unleash your creativity and explore design choices that resonate with your unique style. Whether you’re outlining furniture features or creating captivating ambiance for gatherings.

